We started preparing the garden the week of March 23rd. Although it’s small compared to a large farm, it still requires a lot of preparation time and energy. And we are loving every minute of it! While we prepare and direct seed in the garden, we are also germinating certain vegetable seeds in our DIY Greenhouse. Here are the steps we use to prepare the organic garden to grow vegetables:
Preparing the Garden to Grow Vegetables
1-Clearing the Weeds
The first step in preparing our garden beds is to clear the weeds. Some may suggest rototilling the garden to remove the weeds and break up the soil. Rototilling the soil, especially with the weeds in it, does 2 things:
- Turns the weeds and their seeds into the soil, ultimately keeping the weeds right where they are and spreading the weeds even more.
- Destroys the entire ecosystem that has been thriving underneath the ground. The ecosystem that has been created allows for your plants to flourish. When you break up that ecosystem, it needs to regenerate all over again. Maintaining everything that you worked hard to create is the ideal state for your vegetable plants to grow in.
Rototilling would be the easier and faster way to prepare the garden. However, we prefer a more manual method that maintains the thriving ecosystem in the soil. Using a hoe, we take off the weed layer only.
We also only prepare the rows we need right before we need them. Rows are needed when we are ready to plant seeds or when we have seedlings to transplant. You do not want to allow the soil to remain ‘naked’ and exposed. Cover crops are usually used to add nutrients back into the soil that is not being used. Other natural soil ‘covers’ include leaves or straw.
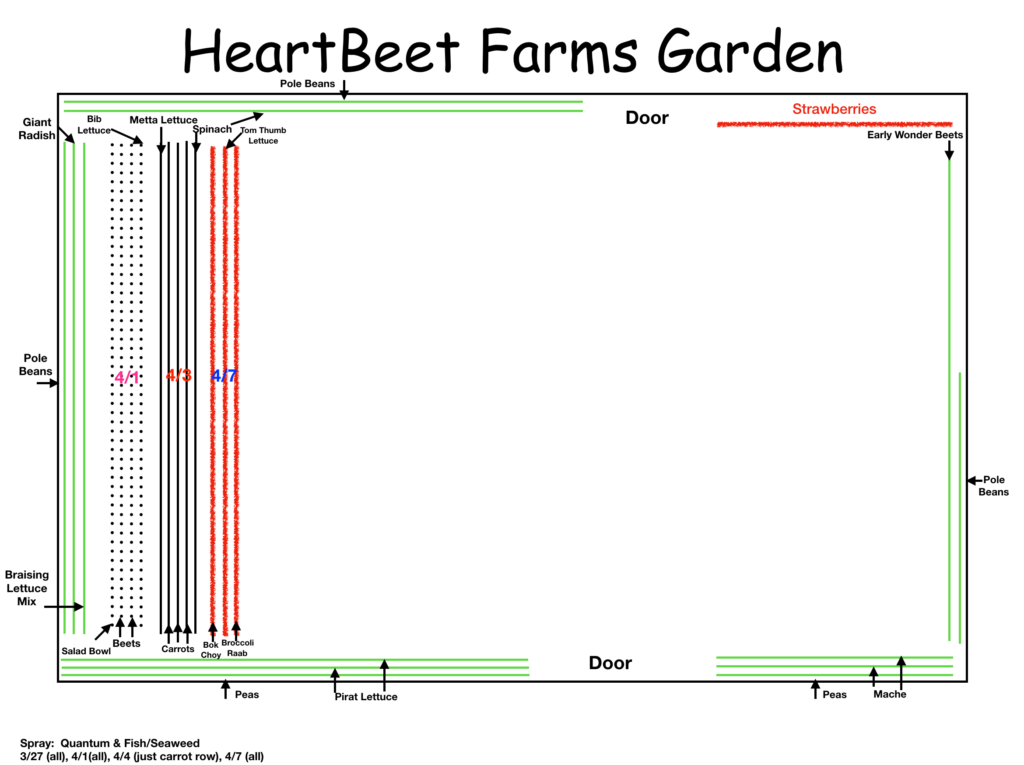
We worked on preparing the perimeter of our garden first and then started making rows from east to west. We planted some pole beans, peas, several varieties of lettuce, beets, carrots, spinach, broccoli raab, and a few Asian greens so far.
2- Add and Spread Compost
We did not have an opportunity to test the soil at our garden this season. Normally, we send soil samples to a local lab and perform tests to assess the level of organic material as well as the deficiencies in the soil. This then tells us what nutrients need to be added to the soil.
The soil at our garden appears to be very good. The garden typically produces very abundantly. However, adding compost, or organic matter, can always help a garden flourish and has lasting effects into the next season. Compost has several significant benefits that you can read more about here. After clearing the weeds, we spread a thick layer of compost over the bed.
3-Add Biochar and Humates
The Earth’s soil is depleted. Adding minerals back into our Earth’s soils is a global initiative carried out by many farmers. Increased nutrition in our soil creates nutrient-rich plants and nutrient-rich vegetables. Using biochar captures carbon in soils while building nutrient density in plants.
Biochar
Biochar is also known and horticultural charcoal or activated carbon. It is a super charcoal made by heating any biomass without oxygen. All of the cellulose, lignin and other, non-carbon materials gasify and are burned away. What remains is pure carbon – 40% of the carbon originally contained in the biomass.
Using Biochar as a soil amendment results in:
• Bigger yields
• Healthier soil
• Lower acidity
• Better water retention
• Stronger plants
• Richer soil life
• Less contamination
• Higher fertility
• Promotes seed germination
Humates
Humates, which are composed of various forms of carbon, are naturally occurring material that is very rich in humified organic matter and humic substances. They consist of humic and fulvic acid along with the raw humates (prehistoric plant matter) from which these powerful natural acids are derived. Humic acid promotes fungi. Beneficial fungi are the missing link in many soils. It stabilizes nitrogen and improves nitrogen efficiency.
The combination of biochar and humates is a very powerful and inexpensive nutrient addition to the soil with significant impacts. When spreading the biochar and humate dust, use it sparingly. A lot goes a very long way. Spreading it in the spring or fall is beneficial. We are spreading it in the spring as we create each bed.
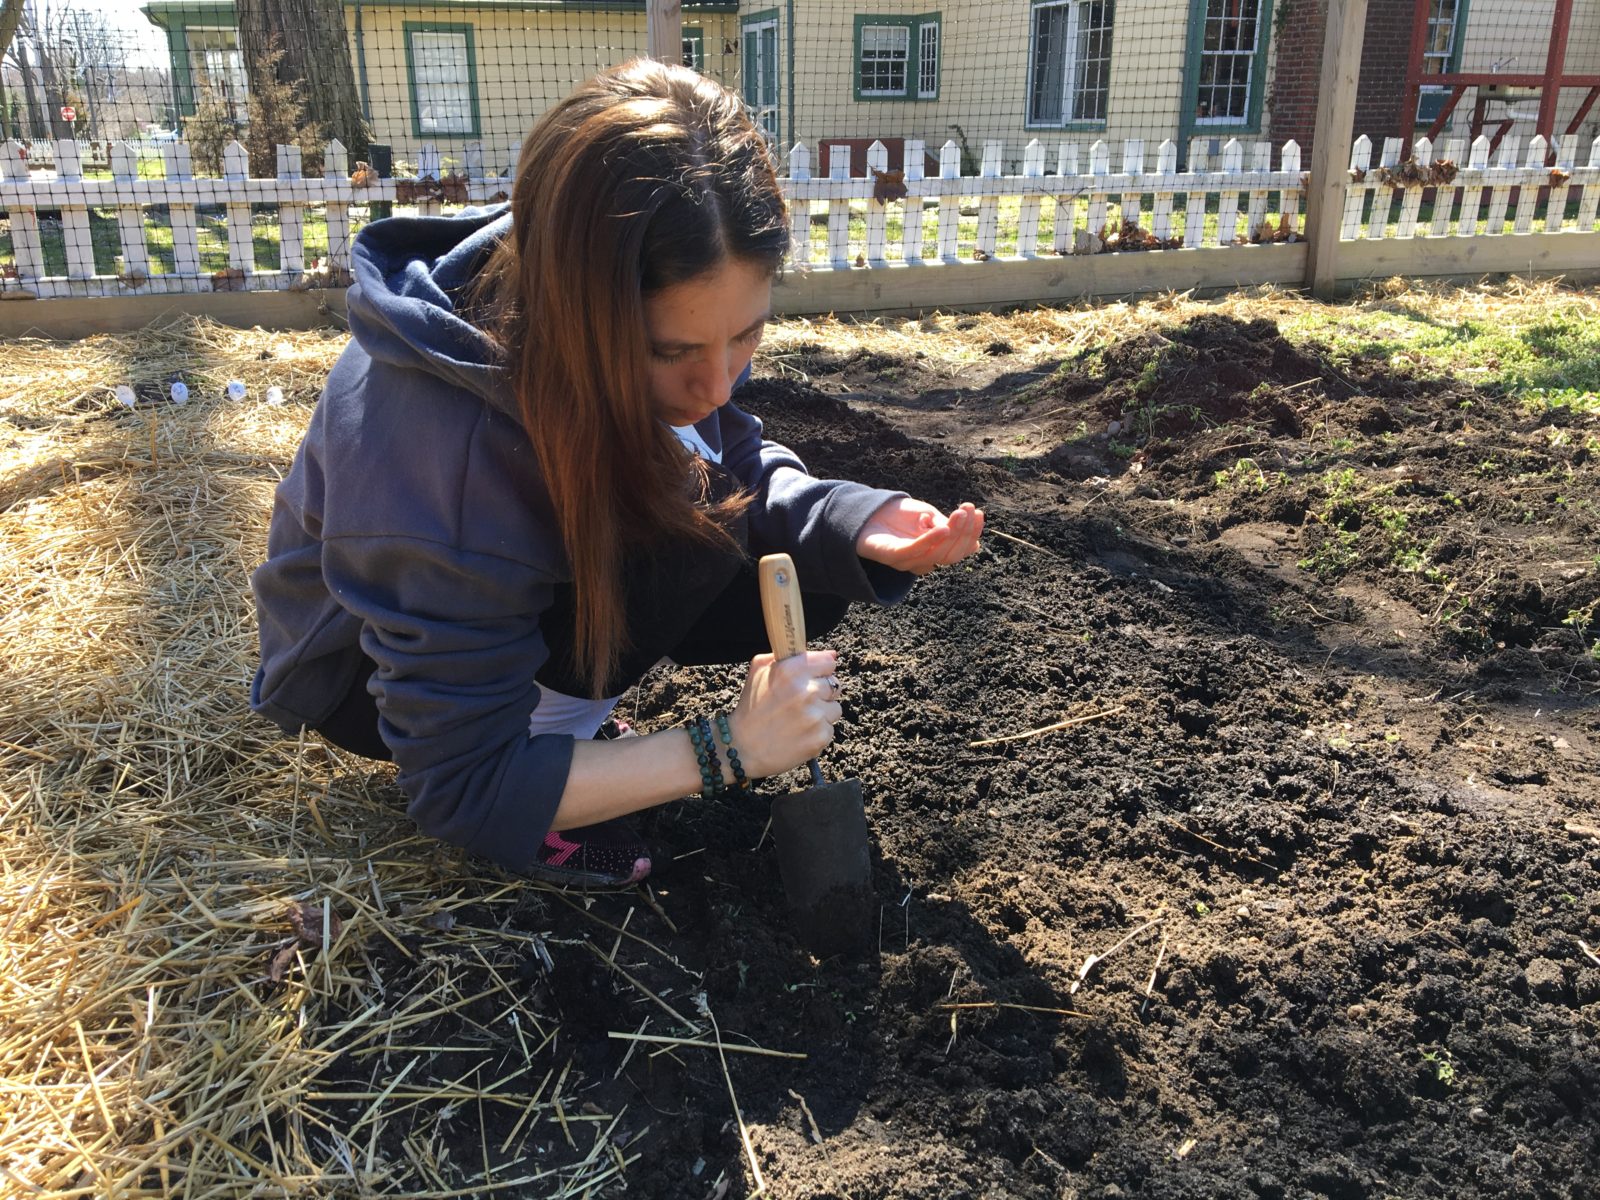
4-Planting Seeds or Transplanting Seedlings
So we made it to the best part, in my opinion. Planting the seeds or transplanting the seedlings is a very rewarding experience. Carefully read seed packets to learn about when the seeds can be planted, how far apart and how deep. And, most importantly, you need to learn about companion planting. Companion planting teaches you what plants can be planted close to each other and what plants cannot.
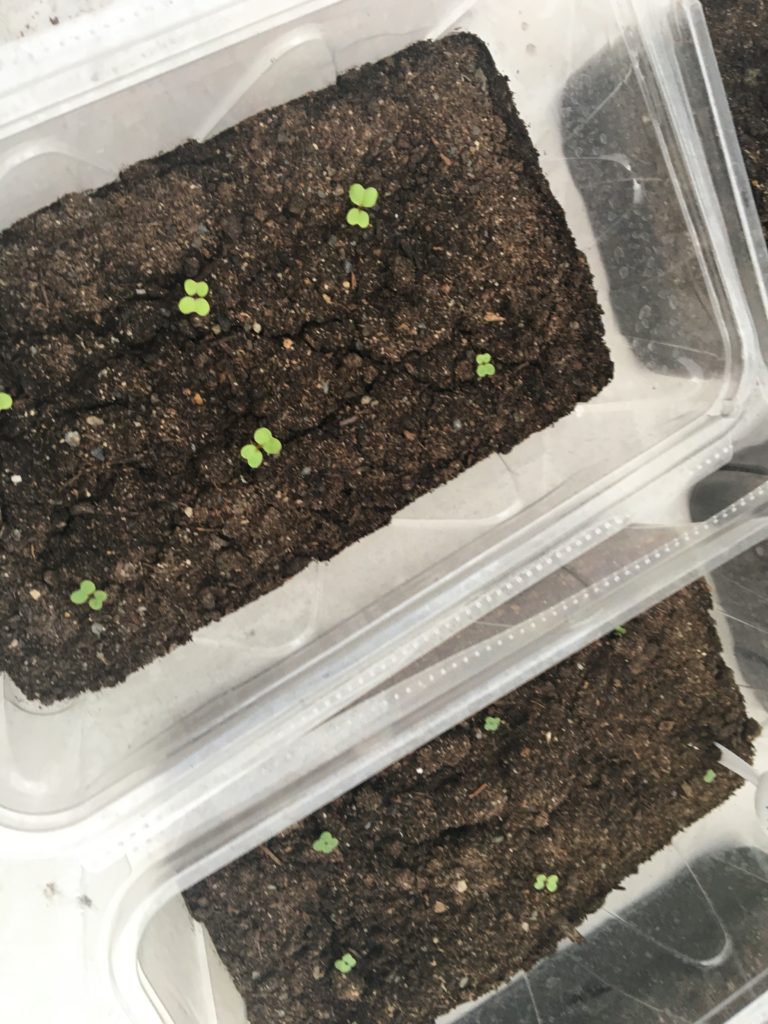
As mentioned, we are growing some plants in our DIY Greenhouse. These seeds needed time and a warmer environment to germinate in order to be ready to produce for the season. Some of the seedlings growing in our greenhouse include kale, swiss chard, tomatoes, peppers, herbs, squash, eggplant, and cucumbers When transplanting these plants to the ground, we normally dip them in a solution of Neptune’s Fish & Seaweed and Quantum to help give them a boost when transitioning to a new environment.
5-Spraying a Nutrient Solution
After we plant seeds and when we transplant seedlings into the ground, we need to give our plants a boost of nutrition. We use a mixture of two products diluted in water:
Neptune’s Fish & Seaweed Organic Fertilizer
Neptune’s Fish & Seaweed Fertilizer is organic and is bascially food for our plants. It is made from North Atlantic fish which are biologically broken down into a nutrient-rich plant food. Basically, it is the end result of a no waste program implemented by a seafood company eager to find a way to recycle the carcasses and other parts of fish that are not considered consumable. So they decided to recycle the other parts of the fish! Neptune’s Fish & Seaweed provides complete nutrition for plants. It increases natural sugars in fruits and vegetables and encourages plentiful, longer-lasting blooms.
Quantum Microbial Inoculant
Quantum is an organic product that adds microorganisms into the soil. It maximizes plant photosynthesis and increases additional reserve energy from nutrients, carbon and light. Quantum helps plants recover from damage by disease, environmental stress and drought. It results in better and more abundant fruits and vegetables. When applying quantum, you will normally see a boost in growth.
6-Apply Straw Over the Bed
It is important to never leave soil completely exposed to the elements without some type of natural coverage. We use straw to cover our beds. Straw is a stalk, usually a waste product of wheat. It is not hay which is typically alfalfa or grass.
Straw helps conserve soil moisture and prevents rapid soil drying. Most importantly, straw also suppresses most weeds so they can’t grow and establish in the bed. This is critical in organic gardening.
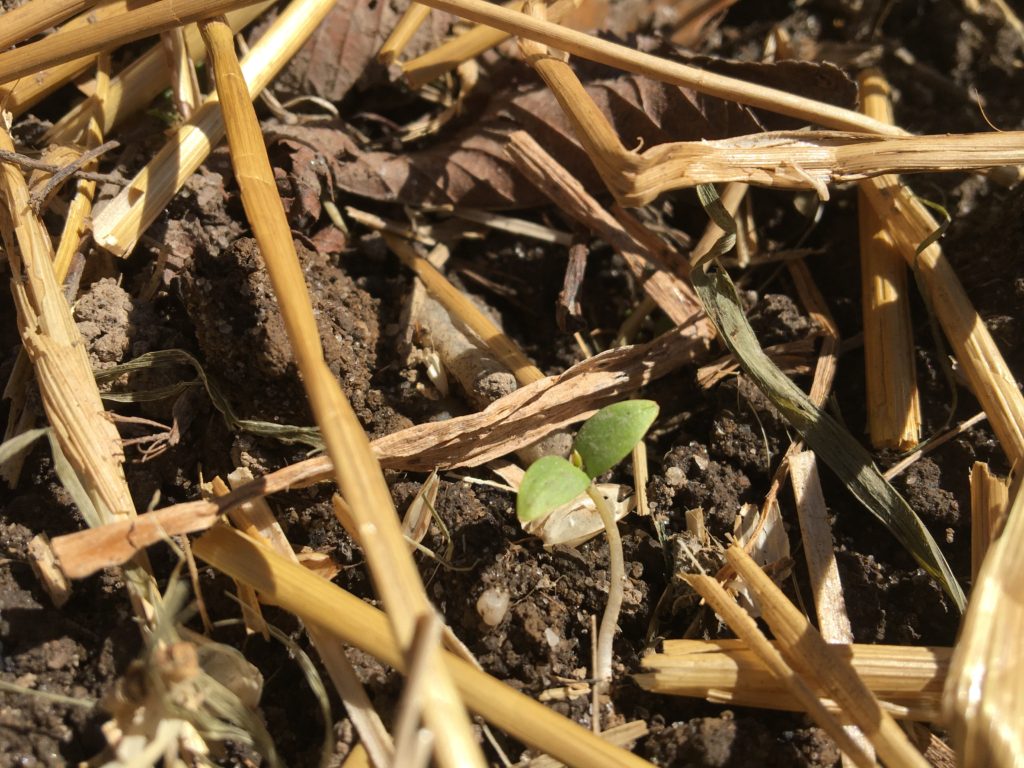
If you follow these simple steps, you should see a beautiful seedling come to life within the germination timeframe. And what an amazing feeling it is to see life grow and know that you are responsible for it! Start planting your garden today and become a part of where your food is coming from!